Saturday, December 1, 2018

Fed up on Encryption?

Fed up on Encryption?
As we all know encryption is a hectic process. We have to maintain a key in both encrypting and decrypting and if we lost the key there’s no way to decrypt the ciphertext into plain text and also cost is high in encrypting. Therefore encryption is known as a bit of a chaotic work even though the security is high. Most of the time people tend to use this method only for critical information because of these drawbacks. 
What is data encryption? 
Data encryption translates data into another form, or code so that only people with access to a secret key or password can read it. Encrypted data is commonly referred to as ciphertext. All encryption algorithms are reversible
As we know there are two types of encryptions as Symmetric key encryption and asymmetric key encryption. I’m not gonna go into details about encryption algorithms in here. ☺
In real world, it’s not impossible to break the encryption key. By using a brute force attack, we can try all possible key combinations and break the encryption algorithm. It is the key size that makes breaking the encryption algorithm harder. Algorithms such as RSA, AES consider as more secure in contrast DES, 3DES are easy to break. 
Disadvantages of encryption
  1. Need to maintain a key.
  2. What if key got forgot, stolen ☹
  3. It needs cooperation.
What is data masking?


                     Fig [2] – Masking vs. Encryption  
Data masking is a method of creating a structurally similar but inauthentic version of a particular data set. In here it’s not necessary to reconstruct original data from any intermediate data. When it comes to encryption, being reversible is a must but in data masking reversible is hard (not possible). If a masking algorithm is reversible then it considers as a weak algorithm. From the data security point of view, the best masking solution is random generation since it is independent of original data.
Some erroneously identify both encryption and data masking is the same. Data masking and encryption are two precisely different processes though both of them designed to ensure data protection. 
When comparing to encryption masking is an easy process. It does not encrypt data. We can see data in its’ local format. It just replaced some information only. Even though the best ciphers can be cracked someday masked data cannot be unmasked. That makes it totally ineffective for the attacker and totally safe for the consumer. 
Conclusion
  • If the data is critical and important we can use encryption.
  • If it’s about production data in a test environment, where the genuine data is worthless then its better go with masking. 
  • However, efficiency wise Masking Wins.


Tuesday, August 28, 2018

Incognito is not very Incognito

Hi There!!!

So Today's post is about a habit of all of us, which is Surfing through incognito mode 🙊🙊🙊

Almost all of us use incognito mode to search for some stuff that we don't wanna keep recorded in history😉

But Porn isn't the only reason you may wanna cover yourself up when searching for information. Perhaps you wanna get information about a medical condition, and you don't want it to pop up later on the family PC. Maybe you're shopping for a surprise gift and you don't want anyone to find out what you are up to. When it comes to booking tickets online you may find rather cheap prices when comparing to normal browsers because when you're browsing through normal search engines they track your interests and remember what you’ve searched for, and they try to manipulate prices based on your interests. So, using incognito mode is safe during these kinds of activities. 

When using Incognito mode, your browser history won't be saving, and when the Incognito window is closed, all the cookies that have been created during that session will also get deleted. 


But have you ever thought whether this incognito mode is actually safe, that it makes you invisible in cyberspace??????? 🤔🤔

Actually, the answer is NO 😔. Will see how it works. ✌

So, as we all know in normal web browsers, it stores browsing history, cookies and it also saves your download history, searches entered into the address bar, passwords, and pieces of web pages so they will load faster in the future (cache)

Then there is something called Super Cookies. Some websites use this to track you down.

Super Cookie 
A supercookie is a type of browser cookie that is designed to be permanently stored on a user’s computer. Supercookies are generally more difficult for users to detect and remove from their devices because they cannot be deleted in the same fashion as regular cookies. 

[https://www.techopedia.com/definition/27310/super-cookie]

Porn websites use these Super cookies to keep track of you down. When you return to a particular website that you visited before they can get the user's entire history between two visits. 

Try login into your email by an incognito tab. You can see data like your username and password are filled up despite the Incognito mode.


Incognito mode does not hide your IP address, so information such as your location, your browser, your operating system, and even your physical address might still be seen by the public and even your ISP (Internet Service Provider) can track you down and monitor all your activities, and if you are using devices from your workplace certainly your employer is capable of tracking you down. As an example, Facebooking at work in incognito mode when you’re not supposed to be on Facebook isn’t hiding your activity. Your employer can still log you. So Sad! 👦

So, if you want actual security, the recommended method is using TOR Browser or a VPN. Also, you can encrypt data to be sure what goes through your VPN or Tor is secured. 

Download tor browser from here ->  https://www.torproject.org/projects/torbrowser.html.en

References

https://www.hotspotshield.com/resources/can-ip-addresses-be-tracked-in-incognito-mode
https://secureswissdata.com/incognito-mode-safe/


Since I'm still an undergraduate who's learning stuff please do let me know if there are any mistakes I've made in my post. 😁😁

Friday, July 6, 2018

Exploit Metasploit 2 using Oracle Linux

Normally, in exploitations, we use Kali Linux.

To exploitations, we need some tools like Nmap, Nessus, Postgresql, Msfconsole. In Kali,PostgreSQL and msfconsole come as inbuilt tools.

But when we use other OSs like Oracle, Fedora we need to install those tools first.
In this post, I'm going to show you how to install PostgreSQL and Msfcosole tools in Oracle and exploit Metasploit 2 Linux. 💁

What is PostgreSQL?

PostgreSQL, often simply Postgres, is an object-relational database management system (ORDBMS) with an emphasis on extensibility and standards compliance. As a database server, its primary functions are to store data securely and return that data in response to requests from other software applications. It can handle workloads ranging from small single-machine applications to large Internet-facing applications (or for data warehousing) with many concurrent users; on macOS Server, PostgreSQL is the default database; and it is also available for Microsoft Windows and Linux (supplied in most distributions).

What is Msfconsole?

The msfconsole is probably the most popular interface to the Metasploit Framework (MSF). It provides an “all-in-one” centralized console and allows you efficient access to virtually all of the options available in the MSF. msfconsole may seem intimidating at first, but once you learn the syntax of the commands you will learn to appreciate the power of utilizing this interface.


As you can see PostgreSQL service is not installed in Oracle.

So let's begin the installation.


1)Install Postgresql ->done!

yum install PostgreSQL-server


As you can see we are getting an error saying failed to start Postgresql database server

To avoid this problem we need to first start the PostgreSQL service first.


Now service is successfully running.

2)Start the PostgreSQL service. -> Done!

systemctl start postgresql
systemctl status postgresql


3)Enable the PostgreSQL service. -> Done!

Now we need to install the msf to Oracle


4)Install msf ->Done!

curl https://raw.githubusercontent.com/rapid7/metasploit-omnibus/master/config/templates/metasploit-framework-wrappers/msfupdate.erb > msfinstall && chmod 755 msfinstall && ./msfinstall

In here we also add the repository and install the Metasploit Framework package.


we have successfully installed the msf.


Now you can run the msfconsole in Oracle.

After that, you can exploit the system as same as in the Kali Linux.

In here I used the Vsftpd backdoor vulnerability.


  • In this link, you can find out how to exploit Metasploit 2 using Kali Linux.

https://www.hackingtutorials.org/metasploit-tutorials/exploiting-vsftpd-metasploitable/

Other Useful Links

https://metasploit.help.rapid7.com/docs/installing-the-metasploit-framework


Friday, June 22, 2018

Bad Rabbit Ransomware Attack

Bad Rabbit is a latest ransomware attack that was spread mainly in Russia in 2017. Especially it targeted organizations and consumers, it was falling on the media outlets in the country. Servers were down during this time due to this attack. It encrypts end device’s files and demands a payment to decrypt them. Specifically, Malware operators asked for 0.05 BTC to decrypt those affected files. This ransomware used DiskCryptor software to encrypt files on attacked computers.

This was distributed using drive-by attacks.

Drive-by attacks
install a malicious code into HTTP or PHP code on one of the pages in insecure websites. It can install malware directly into the end device.

How to Detect the Ransomware

It used a fake adobe flash installer while end user visits an insecure website. The victim has to execute the malware unwittingly by himself to the end device. After doing so malware can self-propagate across a network. In Ukraine, Bad Rabbit ransomware attacked core infrastructure of transport side. There were airport delays at Odessa airport because all the passenger details had to processed manually also it affected subway systems due to payment delays on customer service terminals.

After dropper has been installed, files will get encrypted then above message will display on the screen of the end device. It directs the user to access the particular website. Then victim will warn by giving a countdown of a time that he should pay the asked price before the time to get the key to decrypt files.

How the exploitation happens

Bad Rabbit exploitation is done by using the EternalRomance RCE exploitation method. This method takes advantages of a flaw in Microsoft’s Windows Server Message Block (SMB). By this, it can transfer data between connected computers and thereby activate remote code execution. It also has a code that allows remote hackers to easily propagate to another computer from an infected computer. Bad rabbit can exploit both windows management instrumentation command-line (WMIC) and Server Management Block.

As mentioned earlier malicious dropper needs to be manually installed by the end user. After that malicious DLL (Dynamic Link Library) will be saved as ‘infpub.dat’. Then it will install the malicious file ‘dispci.exe’ into windows and create a task to launch the ransomware and also it finds the invaded computer’s data files and encrypt them using public RSA-2048 key, On the other hand, it will install a modified bootloader to victim’s computer to prevent it from running the normal boot process. DiskCryptor driver ‘dcrypt.sys’ encrypt the partitions of the infected computer’s disk using the AES cipher in XTS mode.

How to Prevent the ransomware

  • Keeping the system’s antivirus software up-to-date (If the system does not have one installed in it, install one first.)
  • Avoid downloading or executing any updates from Adobe Flash because of the source of this ransomware lies in Adobe Flash updates. Make sure to download Adobe updates and software directly from the service provider of Adobe.
  • As a safeguard make sure to back up all the data in the system (regularly). 
  • Use a web filtering mechanism to block any malicious courses. Make sure to check emails received twice before opening any files attached to them. Moreover, to avoid receiving such emails implementing multilayered security solutions is a way of preventing bad rabbit.
How to take actions after the attack

  • To stop distribution of this attack over the network, try disabling the WMI service.
  • If the fake updates of Adobe Flash were accidentally downloaded, avoid executing any files that have the path c:\windows\cscc.dat and c:\windows\infpub.dat. To block execution of these files better user GPO or any other method. The other thing is creating fake file paths i.e. c:\windows\cscc.dat and c:\windows\infpub.dat in the machine because it will look for the existence of these two files before infecting the system.
  • As mitigations to SMB, vulnerability US-CERT recommends users to disable SMBv1 and block any of these versions of SMB i.e. 137,138,139,389,445,901 and other service-related ports. In case of a need for a SMB service, it is necessary to use strong passwords and make sure to change the password time to time.
  • In addition, remember not to store credentials as cookies.

This particular article previously done as a survey to a university(SLIIT) by me and another colleague as undergraduates. All the information are genuine and not cited as it is from any website.

Thursday, May 10, 2018

How to use Facebook login on your Website - OAuth 2.0 framework

OAuth 2 is an authorization framework that enables applications to obtain limited access to user accounts on an HTTP service, such as Facebook, GitHub, and DigitalOcean. It works by delegating user authentication to the service that hosts the user account and authorizing third-party applications to access the user account. OAuth 2 provides authorization flows for web and desktop applications, and mobile devices.

[www.digitalocean.com]


This is a sample page that you can use as a test run to log in to Facebook.
When we click the button Log In With Facebook it will redirect you to the Facebook Login page.


After that, You will redirect to the Facebook and it will grab details that required to your site.


So as the 1st step you need to create FB app in https://developers.facebook.com site.


Then you have to complete the settings

Under the Settings of the Facebook Login, you need to provide the Redirection URL. (Valid OAuth redirect URLs).


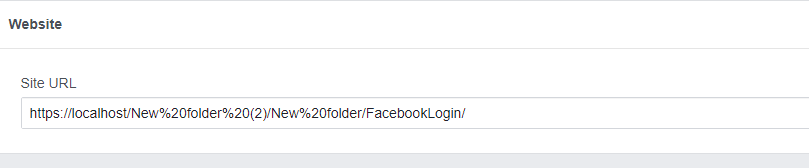
You have to Provide a Valid Site URL under Settings. 


You have to mention your redirect URL in the Code also.


Now the app is registered on Facebook. In the Dashboard, you can see the App ID and the App Secret
After Giving the Correct details to settings your Facebook app can go live.


You have to provide the app id and the app secret in your coding to access the Facebook app.

then we need to get the authorization code

To do that we need to send an HTTP GET request to the Authorize Endpoint of Facebook, which is https://www.facebook.com/dialog/oauth.

Here I have used
  • response_type                       = code
  • client_id (same as App ID ) = 2205707049656941 . [app ID] 
  • redirecti_uri                          =  https://generalinternetsecuritystuff.blogspot.com/2018/05/how-to-use-facebook-login-on-your.html
  • scope                                       =  public_profile 
Sample request

Once you Continue, Facebook will redirect the browser to the Redirection URL 


?code=AQCTl2MLMQ38zLqYWbbs8mFj0W99x86yFwvwXL-uihDNsVZ99VH6bse8idIroA7SzUndgEUBsC4_xWz2D0dDPjnWUk6Sr9CJslCFUah5ktOj6dnRUi71AJv2YWmVVBMG6f6w9wazyX5c7vLG-hD5rdFp70tzYSiAPRgSSVLXNuQxOFh5DdmmKG1ZGmtq97XXFvud6DGGj7EY4mOhZJzrlzG5kWVriUrX2AeHQkdbzEK-t9B315bE95YpGpURNe5t-Rm67yjNwf5e_8lQjNqWDgJi7wQZC0OGxBXmK1UDnXHny1_Z_fHS-Ny3isCjzV7EExUtGPz69Si1qjWyh_pozNZkBPQ9NjUgnnEMM16sWv6hiA#_=_

The bold part is the value of the code parameter.

Then we need to grab the Access Token.

For that, the client web application has to send an HTTP POST request to the Token Endpoint of facebook sending the authorization code received in the previous step.

When sending the request we can use  RESTClient.


Now you have the Access Token.

After completing these steps you can Login to Facebook within any website.


Wednesday, May 9, 2018

Cross-site Request Forgery protection in web applications via Double Submit Cookie Patterns

If storing the CSRF token in session is problematic, an alternative defense is a use of a double submit cookie. 

what is a double submit cookie


  • A double submit cookie is defined as sending a random value in both a cookie and as a request parameter, with the server verifying if the cookie value and request value match. 
  • When a user authenticates to a site, the site should generate a (cryptographically strong) pseudorandom value and set it as a cookie on the user's machine separate from the session id. 
  • The site does not have to save this value in any way, thus avoiding the server-side state. 
  • The site then requires that every transaction request include this random value as a hidden form value (or another request parameter).
  •  A cross-origin attacker cannot read any data sent from the server or modify cookie values, per the same-origin policy. This means that while an attacker can force a victim to send any value he wants with a malicious CSRF request, the attacker will be unable to modify or read the value stored in the cookie. 
  • Since the cookie value and the request parameter or form value must be the same, the attacker will be unable to successfully force the submission of a request with the random CSRF value.


[www.owasp.org]


steps to follow

  • create a login form.
  • create 2 cookies to store the session id and CSRF token.
  • create a javascript function to reads the CSRF token cookie value.
  • validate values in the form.
First, we need to create 2 cookies


  setcookie("csrf_token",$csrf_to,time()+3600,"/","localhost",false,true)

we generate the CSRF token on the client side and store it in a cookie and cookie will set in the browser. The CSRF token value is not stored on the server side. 

As you can see CSRF token is now inside a cookie and in the content value of the CSRF token is there.


Then we have to run a javascript to reads the CSRF token cookie value in the browser. 


After that, we need to add a new hidden field to the previously created form to get the CSRF token value to that hidden field.

when the form is submitted CSRF cookie will submit and in the hidden field CSRF token value will get submitted.

After submitting the Form if the CSRF token received in the cookie and also in the message body will match we can display a Successful message.


Friday, May 4, 2018

Cross-site Request Forgery protection in web applications via Synchronizer Token Patterns

Cross-Site Request Forgery (CSRF) is an attack that forces an end user to execute unwanted actions on a web application in which they're currently authenticated. CSRF attacks specifically target state-changing requests, not theft of data since the attacker has no way to see the response to the forged request. With a little help of social engineering (such as sending a link via email or chat), an attacker may trick the users of a web application into executing actions of the attacker's choosing. If the victim is a normal user, a successful CSRF attack can force the user to perform state-changing requests like transferring funds, changing their email address, and so forth. If the victim is an administrative account, CSRF can compromise the entire web application.

[https://www.owasp.org]

From this tutorial, I'll show you how to secure a  Login Form with Synchronizer Token Patterns.


Synchronizer token pattern. 

Synchronizer token pattern (STP) is a technique where a token, secret and unique value for each request, is embedded by the web application in all HTML forms and verified on the server side.

Steps

  • create a login form.
  • create a cookie and store the session id
  • create CSRF token
  • create a javascript function to obtain the CSRF token
  • validate values in the form


First, we need to figure out what is the client side and what is the server side.

In client side, we create the login form, javascript, and cookie
in server side, we create CSRF token.

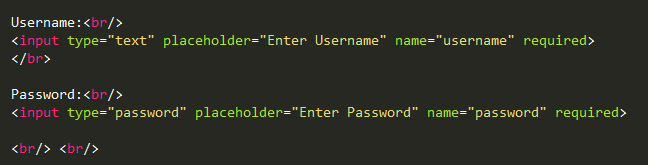
First I created the login form using basic HTML


then I created the cookie which users to validate session id with the server side.

What is a Cookie?

Cookies are a mechanism for storing data in the remote browser and thus tracking or identifying return users. You can set cookies using the setcookie() or setrawcookie() function. Cookies are part of the HTTP header, so setcookie() must be called before any output is sent to the browser. Any cookies sent to server from the client will automatically be included in a $_COOKIE

[http://php.net/manual]


setcookie(name, value, expire, path, domain, secure, httponly);
  • Only the name parameter is required. other parameters are optional. but the maximum number of parameters should be 7. 
  • The secure flag is an option that can be set by the application server when sending a new cookie to the user within an HTTP Response. The purpose of the secure flag is to prevent cookies from being observed by unauthorized parties due to the transmission of the cookie in clear text.
  • The browser will not send a cookie with the secure flag set over an unencrypted HTTP request.
  • HttpOnly is an additional flag included in a Set-Cookie HTTP response header. Using the HttpOnly flag when generating a cookie helps mitigate the risk of client side script accessing the protected cookie 

In this tutorial, I created the cookie using PHP. You can use any language as you prefer.


Note: The setcookie() function must appear BEFORE the <html> tag.

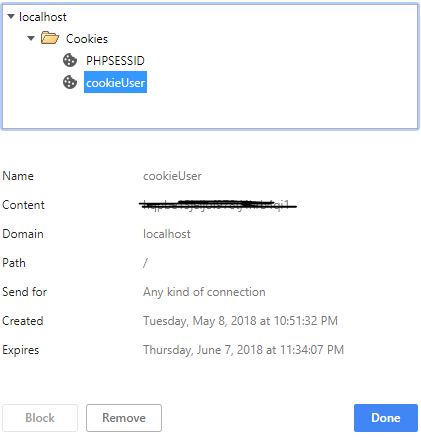
If you created the cookie correctly you can find your cookie in the cookie list after the code executed. 

Up to this point, we were on the client side. Now let's create the CSRF token in server side.


  • base64_encode(openssl_random_pseudo_bytes(32)) - Generates cryptographically secure pseudo-random bytes
  • hash_hmac - Generate a keyed hash value using the HMAC method


After generating the CSRF token we should store the token in the session variable.

$_SESSION['CSRF'] = $csrf_to;

Now let's create a javascript function to obtain the CSRF token via an ajax call. It should create on the client side. From this function, we request the CSRF token from the server side after the client side is loaded. 

Ajax can
  • Read data from a web server - after the page has loaded
  • Update a web page without reloading the page
  • Send data to a web server - in the background


  • onreadystatechange - Defines a function to be called when the readyState property changes
  • readyState - Holds the status of the XMLHttpRequest.
  • status - Returns the status-number of a request
         [www.w3schools.com]

now we need to call the previously created function in client side


  • csrf.php - server-side PHP file
  • cst - hidden field name
we need to add a new hidden field to the previously created form that has the value of the received CSRF token.

then you can see there's the CSRF token in the hidden field 

when we click on the login button all the information will send to the server side.

Now we should validate the received values of the form by writing a function.


In this function, it checks CSRF token and session id is matching with the server and username and the password are correct.


finally, call the function in server side.


References

AND WE FOUND A NEW RANSOMWARE!!!

TODARIUS Hi, it’s been a while, hope you all doing good. 💓 So today’s article is about a new ransomware.  😱 Yes. We found a ne...